Quick Start to configure your ePDQ test account
1. Getting started
When you first sign into your test account, select ‘Home’. You will then be presented with your ‘Activation steps’.

2. Payment methods
Select ‘Your payment methods’ and then ‘Choose new payment methods’. With a test account you can include a variety of payment methods, not just Visa and MasterCard. To add a payment method, please select ‘Add’.

Leave the radio button and the ‘Select an acquirer’ drop-down as is. With the ‘Affiliation number’ field you can supply whatever value you wish, although we recommend simply using ‘1234567’, and then select ‘Submit’.

Once the data has been added, select ‘PM activation’ in the green navigation bar.

Change the radio button to ‘Yes’ and select ‘Submit’. Repeat the process as necessary for the remaining payment methods you wish to have.

If you would like to simulate 3-D Secure please go to the 3-D Secure ‘Activation’ tab, select ‘Activate full 3-D’ and then press ‘Submit’.
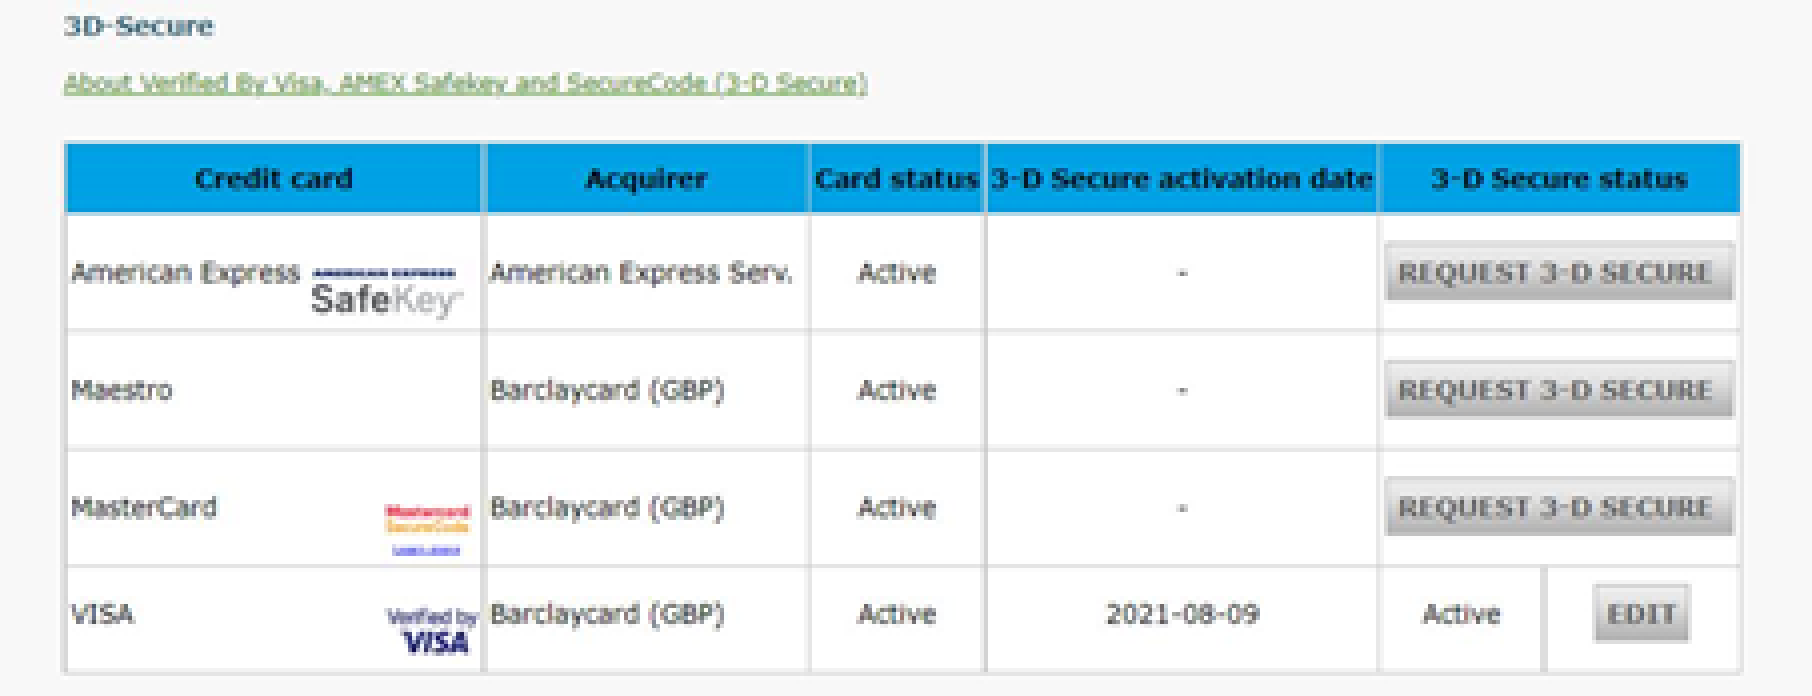
3. Your 3D Secure Settings
When you've added a payment method to the back office of ePDQ, you'll need to ensure that 3D Secure is enabled on your account to allow you fully test authentication through your chosen payment approach.
To do this, you'll need to access ‘Advanced’ and then 'Fraud Detection'.
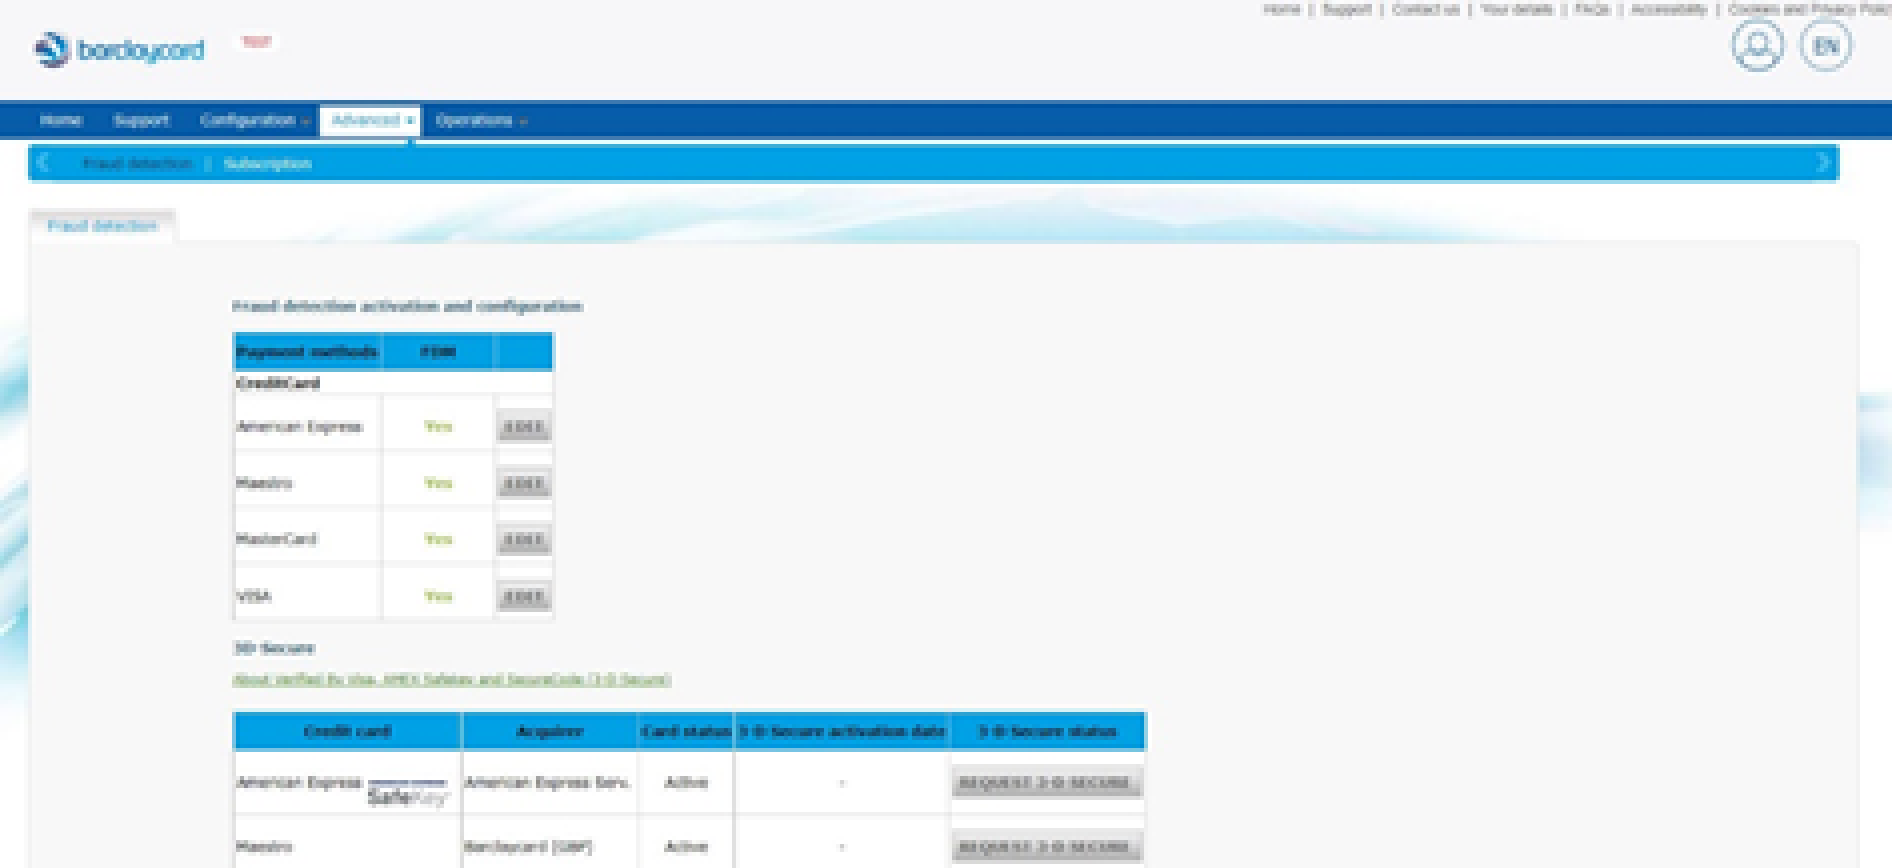
To then enable 3D Secure on your account, you need to select 'Request 3-D Secure' on the given payment method(s).
Once selected, you should be able to see the 3D Secure Status as 'Active', with the ability to edit your Continue/Interrupt fraud options on your account.
4. Your technical settings
Once your payment methods have been configured, select ‘Home’ again and then go to ‘Your technical settings’.

Initially, all you need to do to get the account activated is to configure the SHA-IN pass phrase located in the ‘Data and origin verification’ tab. This pass phrase must be alpha numeric and at least 16 characters long. This can be changed if required at a later point.

Once you have added a SHA-IN passphrase, please select ‘Save’. At this point you can either configure the remaining tabs within ‘Technical information’ or go back to the ‘Home’ page.
5. Activate
Your final step is to activate your account. Please select ‘Activate your account’ and your account will be activated ready for you to use.


Don’t forget your ePDQ options. You can add or remove desired ePDQ options (add-ons) by going to ‘Configuration’ located in the grey, top navigation bar, then ’Account’ in the blue navigation bar and then ’Your options’.